

Lemon bars are one of those desserts that instantly make any day feel brighter. These classic lemon bars have a buttery shortbread crust and a silky, tangy lemon filling that’s perfectly balanced between sweet and sour. They’re ideal for potlucks, picnics, holidays, or a simple afternoon treat with coffee or tea. If you love fresh, citrusy desserts, this will become a go-to recipe. Serve them after a fresh, light dinner like this seafood salad recipe or alongside brunch favorites for a sunny, crowd-pleasing finish.
Table of Contents
Why You’ll Love This Recipe
These lemon bars check every box for an easy, impressive dessert. The crust is a simple press-in shortbread made with pantry staples, so there’s no fussy rolling, chilling, or special equipment. The filling uses real fresh lemon juice and zest for bold citrus flavor that never tastes artificial or overly sweet. They bake up with clean layers, a soft yet sliceable texture, and a delicate dusting of powdered sugar on top. You can make them a day ahead, they travel well, and they’re easy to cut into small squares for feeding a crowd. Pair them with a springy salad like this summer salad and you’ve got the perfect warm-weather menu.
Print
Classic Lemon Bars
- Total Time: 0 hours
Description
These classic lemon bars feature a buttery shortbread crust and a silky, tangy lemon filling made with fresh lemon juice and zest. They’re easy to make, slice beautifully after chilling, and are perfect for brunch, picnics, potlucks, holidays, or a bright afternoon dessert.
Ingredients
For the shortbread crust:
2 cups (240 g) all-purpose flour
1/2 cup (100 g) granulated sugar
1/4 teaspoon fine sea salt
1 cup (2 sticks / 226 g) unsalted butter, melted and slightly cooled
For the lemon filling:
1/4 cup (30 g) all-purpose flour
1 3/4 cups (350 g) granulated sugar
4 large eggs
2/3 cup (160 ml) freshly squeezed lemon juice
1–2 tablespoons finely grated lemon zest
1 teaspoon vanilla extract, optional
2–3 tablespoons powdered sugar, for dusting
Instructions
Preheat the oven to 350°F (175°C). Line a 9×13-inch baking pan with parchment paper, leaving an overhang on two sides. Lightly grease any exposed sides of the pan.
In a medium bowl, whisk together 2 cups flour, 1/2 cup sugar, and 1/4 teaspoon salt for the crust.
Add the melted butter and stir until the mixture looks like damp sand and starts to clump together.
Transfer the crust mixture to the prepared pan and press it firmly into an even, compact layer. Use your fingertips or the bottom of a measuring cup to pack it down well.
Bake the crust for 18–20 minutes, or until the edges are lightly golden and the top looks set.
While the crust bakes, zest the lemons first, then juice them. Measure out 2/3 cup fresh lemon juice.
In a large mixing bowl, whisk the eggs until smooth.
Add 1 3/4 cups sugar, 1/4 cup flour, lemon zest, lemon juice, and vanilla extract if using. Whisk just until smooth and no streaks of flour remain.
When the crust comes out of the oven, gently stir the lemon filling once more, then pour it over the hot crust.
Return the pan to the oven and bake for 18–22 minutes, or until the center looks set and only slightly jiggles when gently shaken.
Remove from the oven and let the lemon bars cool completely at room temperature for 1–2 hours.
Cover and refrigerate for at least 2 hours, or overnight, for the cleanest slices.
Use the parchment sling to lift the bars out of the pan. Dust generously with powdered sugar.
Cut into 20–24 squares and serve chilled or at cool room temperature.
Notes
Use fresh lemon juice for the brightest flavor. Bottled lemon juice can taste flat or slightly bitter.
Do not skip the chilling time. Cold lemon bars slice much more cleanly.
For neat squares, use a sharp knife and wipe the blade with a warm damp cloth between cuts.
Do not overmix the lemon filling, or you may create air bubbles on top.
Store leftovers in an airtight container in the refrigerator for 4–5 days.
To freeze, place cut bars on a tray until firm, then transfer to a freezer-safe container. Freeze for up to 2–3 months and thaw in the refrigerator.
Dust with fresh powdered sugar just before serving, especially if the bars have been refrigerated or frozen.
- Prep Time: lemon bars, classic lemon bars, easy lemon bars, lemon dessert, shortbread crust lemon bars, fresh lemon bars
Ingredients for Lemon Bars
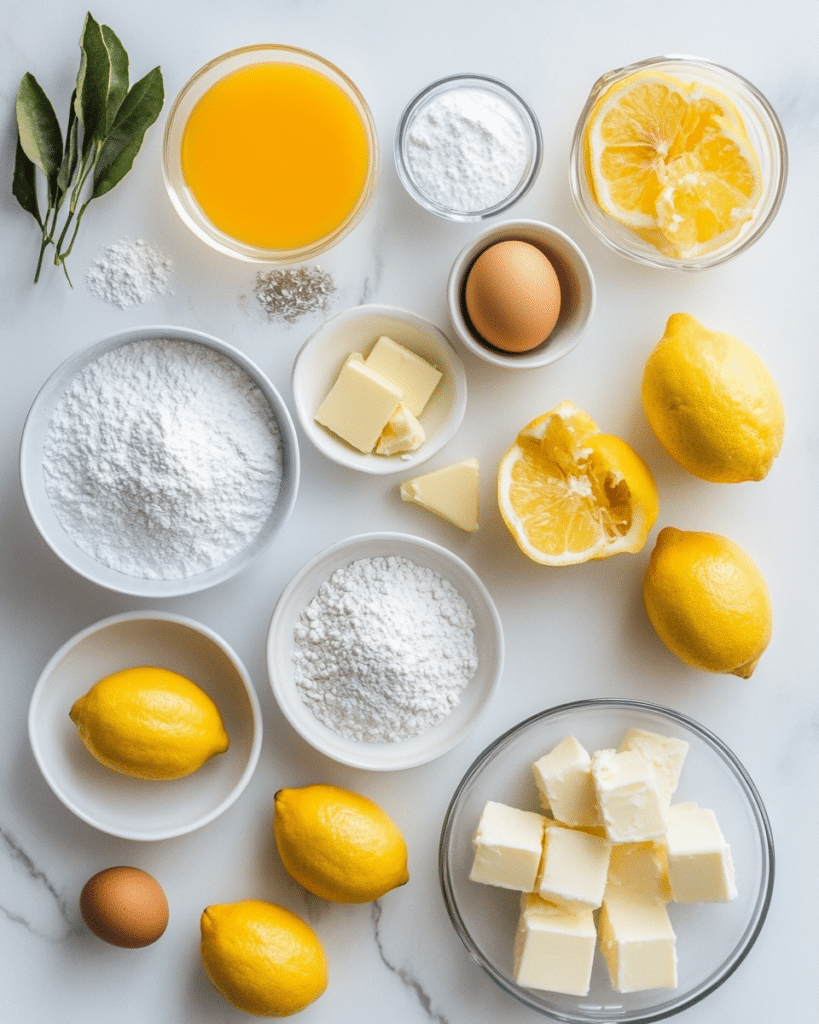
These classic lemon bars use simple, everyday ingredients you probably already have in your kitchen. Fresh lemons are non-negotiable for the best bright flavor, but everything else is basic baking pantry staples. Here’s exactly what you’ll need for both the crust and the filling.
| Ingredient | Amount |
|---|---|
| All-purpose flour (for crust) | 2 cups (240 g) |
| Granulated sugar (for crust) | 1/2 cup (100 g) |
| Fine sea salt (for crust) | 1/4 teaspoon |
| Unsalted butter, melted and slightly cooled | 1 cup (2 sticks / 226 g) |
| All-purpose flour (for filling) | 1/4 cup (30 g) |
| Granulated sugar (for filling) | 1 3/4 cups (350 g) |
| Large eggs | 4 |
| Freshly squeezed lemon juice | 2/3 cup (160 ml) |
| Lemon zest (finely grated) | 1–2 tablespoons (from about 2 lemons) |
| Vanilla extract (optional, for warmth) | 1 teaspoon |
| Powdered sugar (for dusting) | 2–3 tablespoons |
How to Make Lemon Bars Step by Step
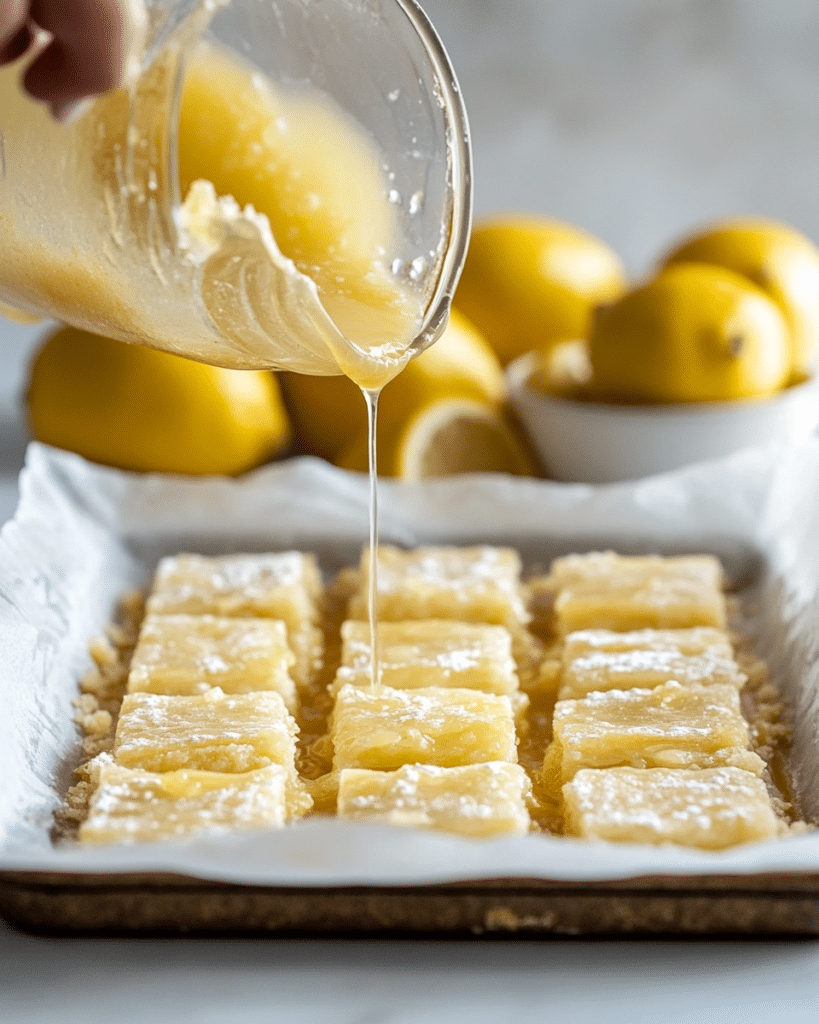
Making lemon bars is all about building two simple layers: a buttery crust and a smooth lemon filling. Give yourself enough time for baking and cooling so they can set properly before slicing. Follow these steps for bakery-style bars with clean edges and intense lemon flavor.
- Step 1: Prep your pan and oven. Preheat the oven to 350°F (175°C). Line a 9×13-inch baking pan with parchment paper, leaving an overhang on two sides to create a sling. This makes it much easier to lift the lemon bars out for clean slicing. Lightly grease any exposed sides of the pan with butter or nonstick spray. While the oven heats, melt your butter and let it cool slightly so it doesn’t feel hot to the touch when mixed with the crust ingredients.
- Step 2: Make the shortbread crust. In a medium bowl, whisk together 2 cups flour, 1/2 cup sugar, and 1/4 teaspoon salt until well combined. Pour in the melted butter and stir with a spatula or spoon until the mixture looks like damp sand and starts to clump together. Transfer to the prepared pan and press firmly into an even, compact layer. Use your fingertips and the bottom of a measuring cup to really pack it down, especially in the corners, so it bakes up sturdy and won’t crumble.
- Step 3: Par-bake the crust. Bake the crust for 18–20 minutes, until the edges are lightly golden and the top looks set, not shiny. While the crust bakes, zest your lemons first, then juice them. Measure out 2/3 cup juice. In a mixing bowl, whisk the 4 eggs until smooth, then whisk in 1 3/4 cups sugar, 1/4 cup flour, lemon zest, lemon juice, and vanilla (if using). Mix just until no streaks of flour remain. You want the filling smooth, but try not to whip in a lot of air.
- Step 4: Add the lemon filling & bake again. As soon as the crust comes out of the oven, gently stir the lemon mixture one more time, then carefully pour it over the hot crust. Tilt the pan to spread the filling into an even layer if needed. Return the pan to the oven and bake for 18–22 minutes. The center should look set and only slightly jiggle when you gently shake the pan. If it’s still very liquid, give it a few more minutes, checking often.
- Step 5: Cool, chill & slice. Remove the pan from the oven and place it on a wire rack. Let the lemon bars cool completely at room temperature (about 1–2 hours). For the cleanest slices, cover and chill for at least 2 more hours, or overnight in the fridge. Use the parchment sling to lift the slab out onto a cutting board. Dust generously with powdered sugar, then cut into 20–24 squares. Serve chilled or at cool room temperature, perhaps with a light meal like Italian pasta salad or a veggie-forward dish such as these vegetarian spring rolls.
Expert Tips
Common Mistakes
One of the biggest mistakes with lemon bars is underbaking either the crust or the filling. If the crust isn’t baked long enough before adding the filling, it can turn soggy instead of crisp and buttery. On the other hand, overbaking the filling can cause it to crack, brown on top, or turn rubbery. Watch for a just-set center with a slight jiggle. Another common issue is skipping the chill time; cutting while warm will give you messy, gooey slices. Don’t overmix the filling, or you’ll whip in extra air that can create bubbles and an uneven top. Finally, use fresh lemon juice, not bottled, it makes a huge difference in flavor and brightness.
Variations

Once you’ve mastered classic lemon bars, it’s easy to play with flavors. Add 1–2 tablespoons of finely chopped fresh berries (like raspberries or blueberries) to the filling for a fruity twist. Swap a few tablespoons of lemon juice for lime juice or orange juice for a mixed-citrus bar. For a nutty spin, stir 1/2 cup finely chopped toasted almonds or pecans into the crust before baking. You can also add 1–2 tablespoons of shredded coconut to the filling for a tropical note.
If you prefer a slightly less tart bar, reduce the lemon juice to 1/2 cup and add 2 tablespoons milk or cream to soften the tang. Serve your flavored bars with brunch dishes like fluffy homemade pancakes to make a complete spread.
Storage Tips
| Storage | Time | Notes |
|---|---|---|
| Room Temperature | Up to 1 day | Keep in a cool spot, tightly covered. Best if your kitchen is not hot or humid. |
| Refrigerator | 4–5 days | Store in an airtight container with parchment between layers to prevent sticking. Ideal for make-ahead. |
| Freezer | 2–3 months | Freeze cut bars on a tray, then transfer to a container. Thaw in the fridge; dust with fresh powdered sugar before serving. |
FAQ
Can I make lemon bars the day before?
Yes, lemon bars are perfect for making ahead. In fact, they slice cleaner after chilling overnight. Bake, cool completely, cover the pan tightly, and refrigerate. Dust with powdered sugar just before serving so it doesn’t dissolve in the fridge.
How do I get clean slices?
Chill the lemon bars for at least a few hours, then use a sharp knife. Wipe the blade clean with a warm, damp cloth between cuts. This removes any sticky filling and keeps the edges neat.
Can I use bottled lemon juice?
You can, but it’s not ideal. Bottled juice often tastes flat or slightly bitter. Freshly squeezed lemon juice gives a brighter, cleaner flavor and really makes these bars stand out. If possible, always use fresh lemons.
Why did my lemon bars crack on top?
Cracking usually means the bars were slightly overbaked or baked at too high a temperature. Check your oven with an oven thermometer if you suspect it runs hot, and start checking the bars a few minutes before the recommended time.
Why did my lemon bars crack on top?
Cracking usually means the bars were slightly overbaked or baked at too high a temperature. Check your oven with an oven thermometer if you suspect it runs hot, and start checking the bars a few minutes before the recommended time.
Do lemon bars need to be refrigerated?
Yes, because of the egg-rich custard filling, lemon bars should be stored in the refrigerator after they’ve cooled. They’re safe at room temperature for a few hours while serving, but refrigerate leftovers for best texture and food safety.
Conclusion
These classic lemon bars bring together a buttery shortbread crust and a bright, tangy lemon filling that never goes out of style. With simple ingredients and straightforward steps, they’re an ideal dessert for both beginners and experienced bakers. Make a batch for brunch, potlucks, or as a refreshing finish after a cozy dinner like classic baked cheesecake night when you want options on the dessert table. Once you see how quickly they disappear, you’ll keep lemons on hand just for this recipe.
Slice them small for sharing, or cut generous squares for true lemon lovers, either way, they’re guaranteed to brighten your table.
For more fruit salad inspirations, check out Pinterest.